CamBar Rigging Guide
Introduction
Rigging the CamBar appropriately to your camera is vital for good quality tracking. This section provides some recommended configurations based on your camera and expected use case.
Specific 3rd party hardware components are listed, however they are often interchangeable with similar parts from other sources
Marker Mode – Cine Style
Here we describe a recommended configuration for mounting the CinCraft Scenario CamBar to a cinema style production camera where 15 or 19mm rods are available, and either ceiling or floor tracking is expected.
Pre-Requisites
Production Camera must feature 15mm or 19mm rods
Recommended Components
- A - CAMVATE Standard 15mm Dual-port Rod Clamp Railblock With One-sided ARRI Rosette Connecting M6 Mount For Shoulder Mount Rig - Retailer Link
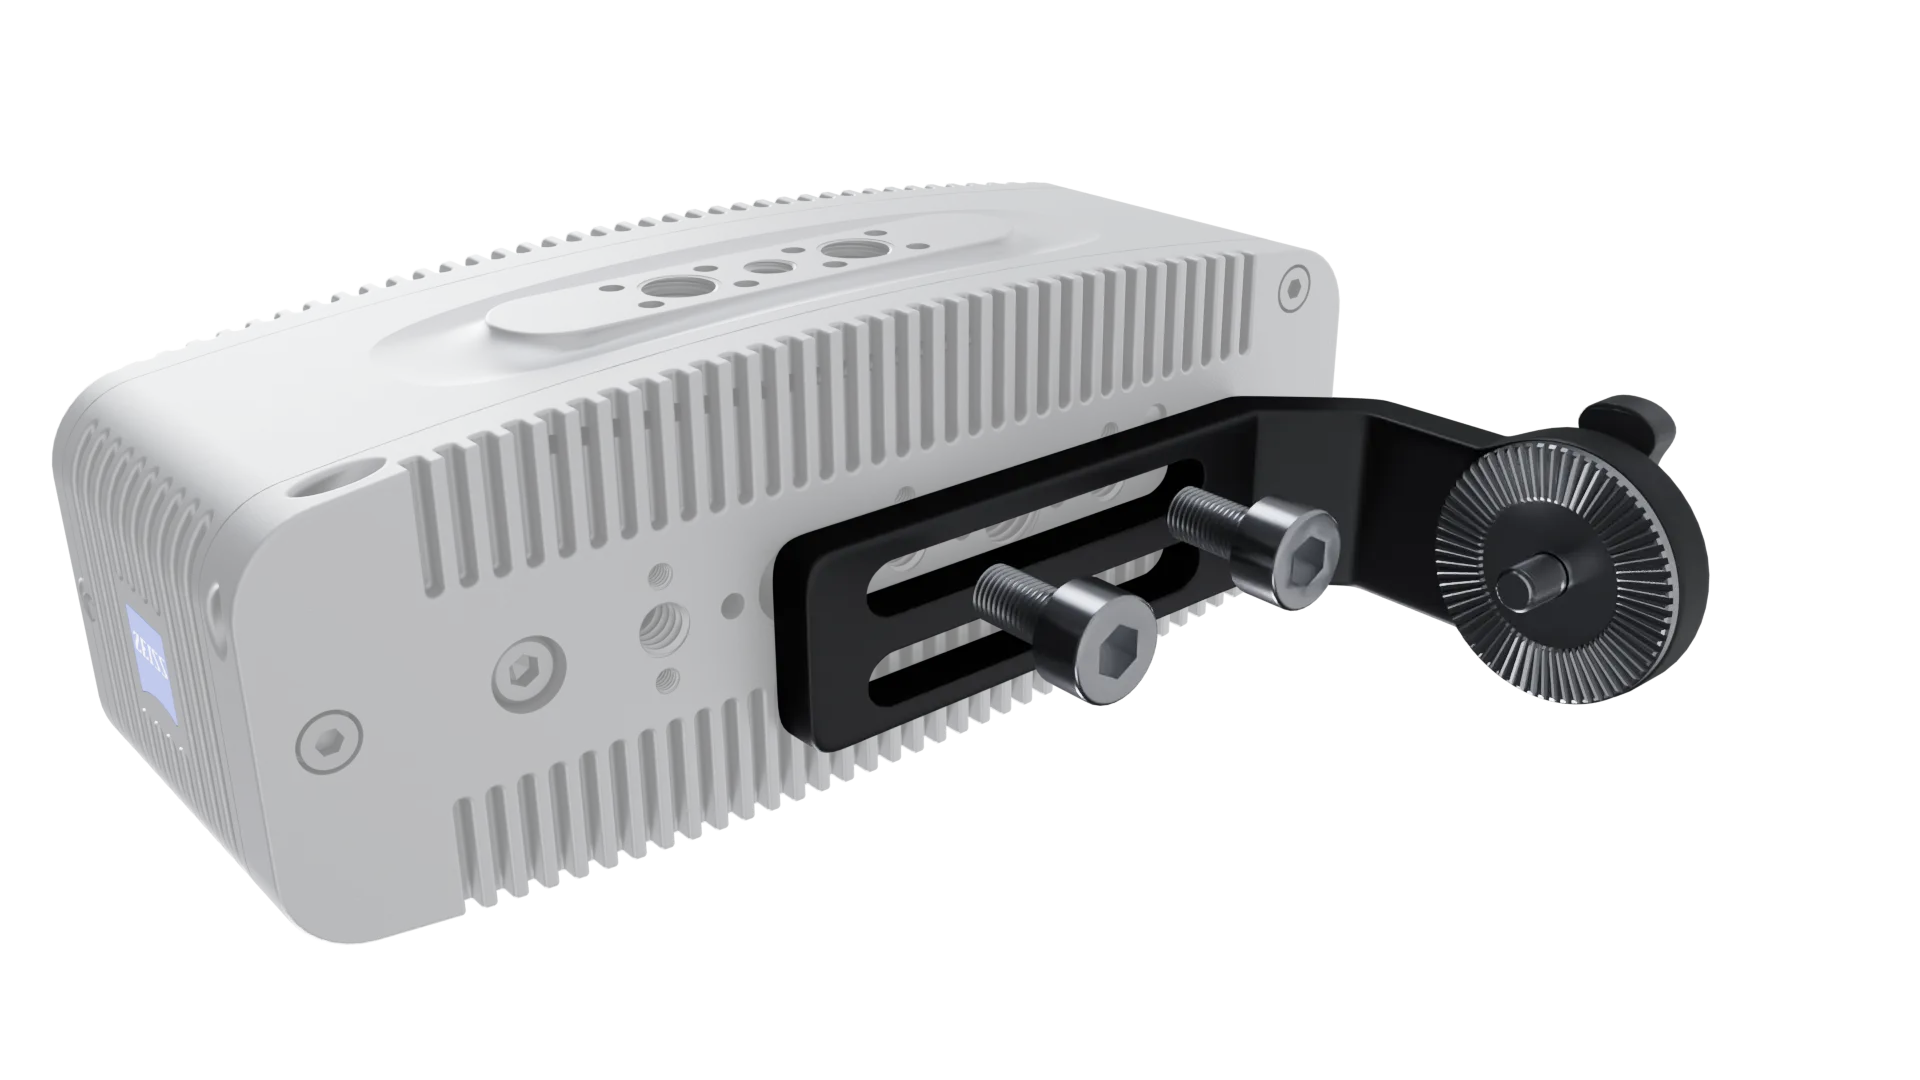
- B - CAMVATE Standard ARRI Rosette Extension Part With M6 Lock Knob & Double 1/4" Mounting Groove - Retailer Link
OR for 19mm rods
- C - CAMVATE 15mm & 19mm Dual-port Rod Clamp With Double Ended M6 ARRI Style Rosette Mount - Retailer Link
Mounting Guidelines
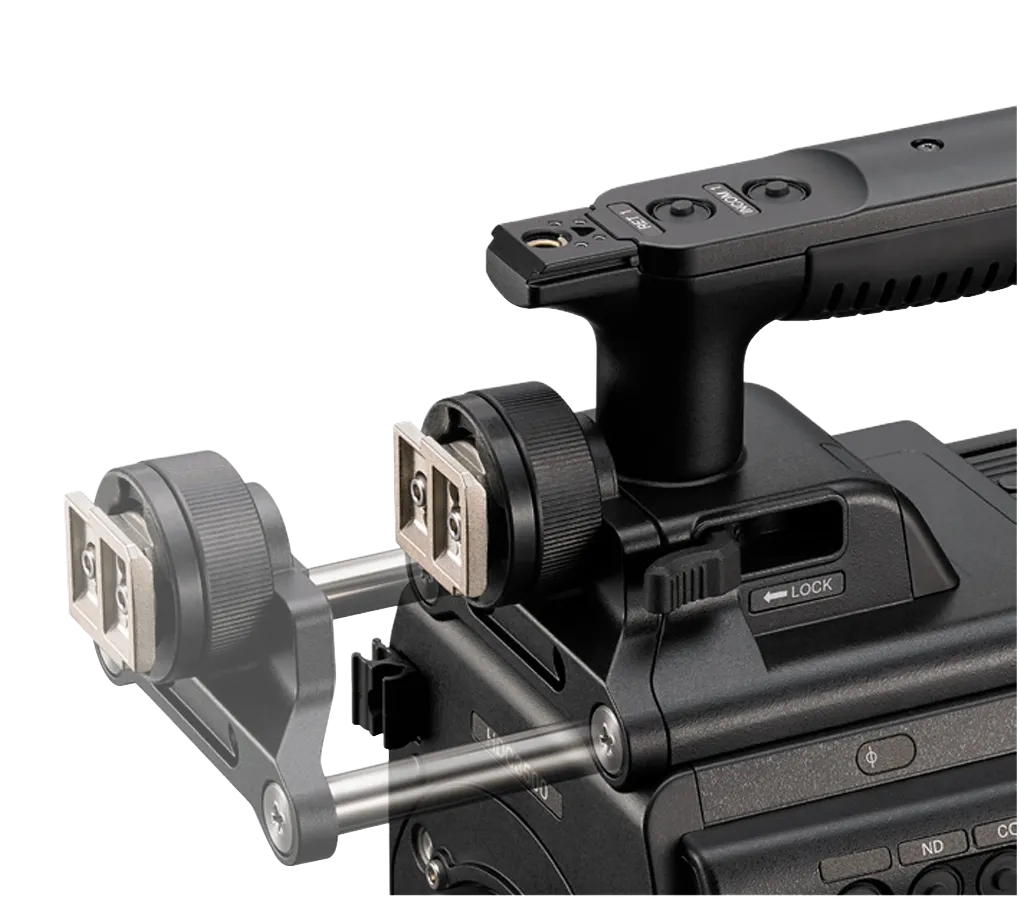
Using 2 x 1/4" screws, affix part B to the rear of the CamBar
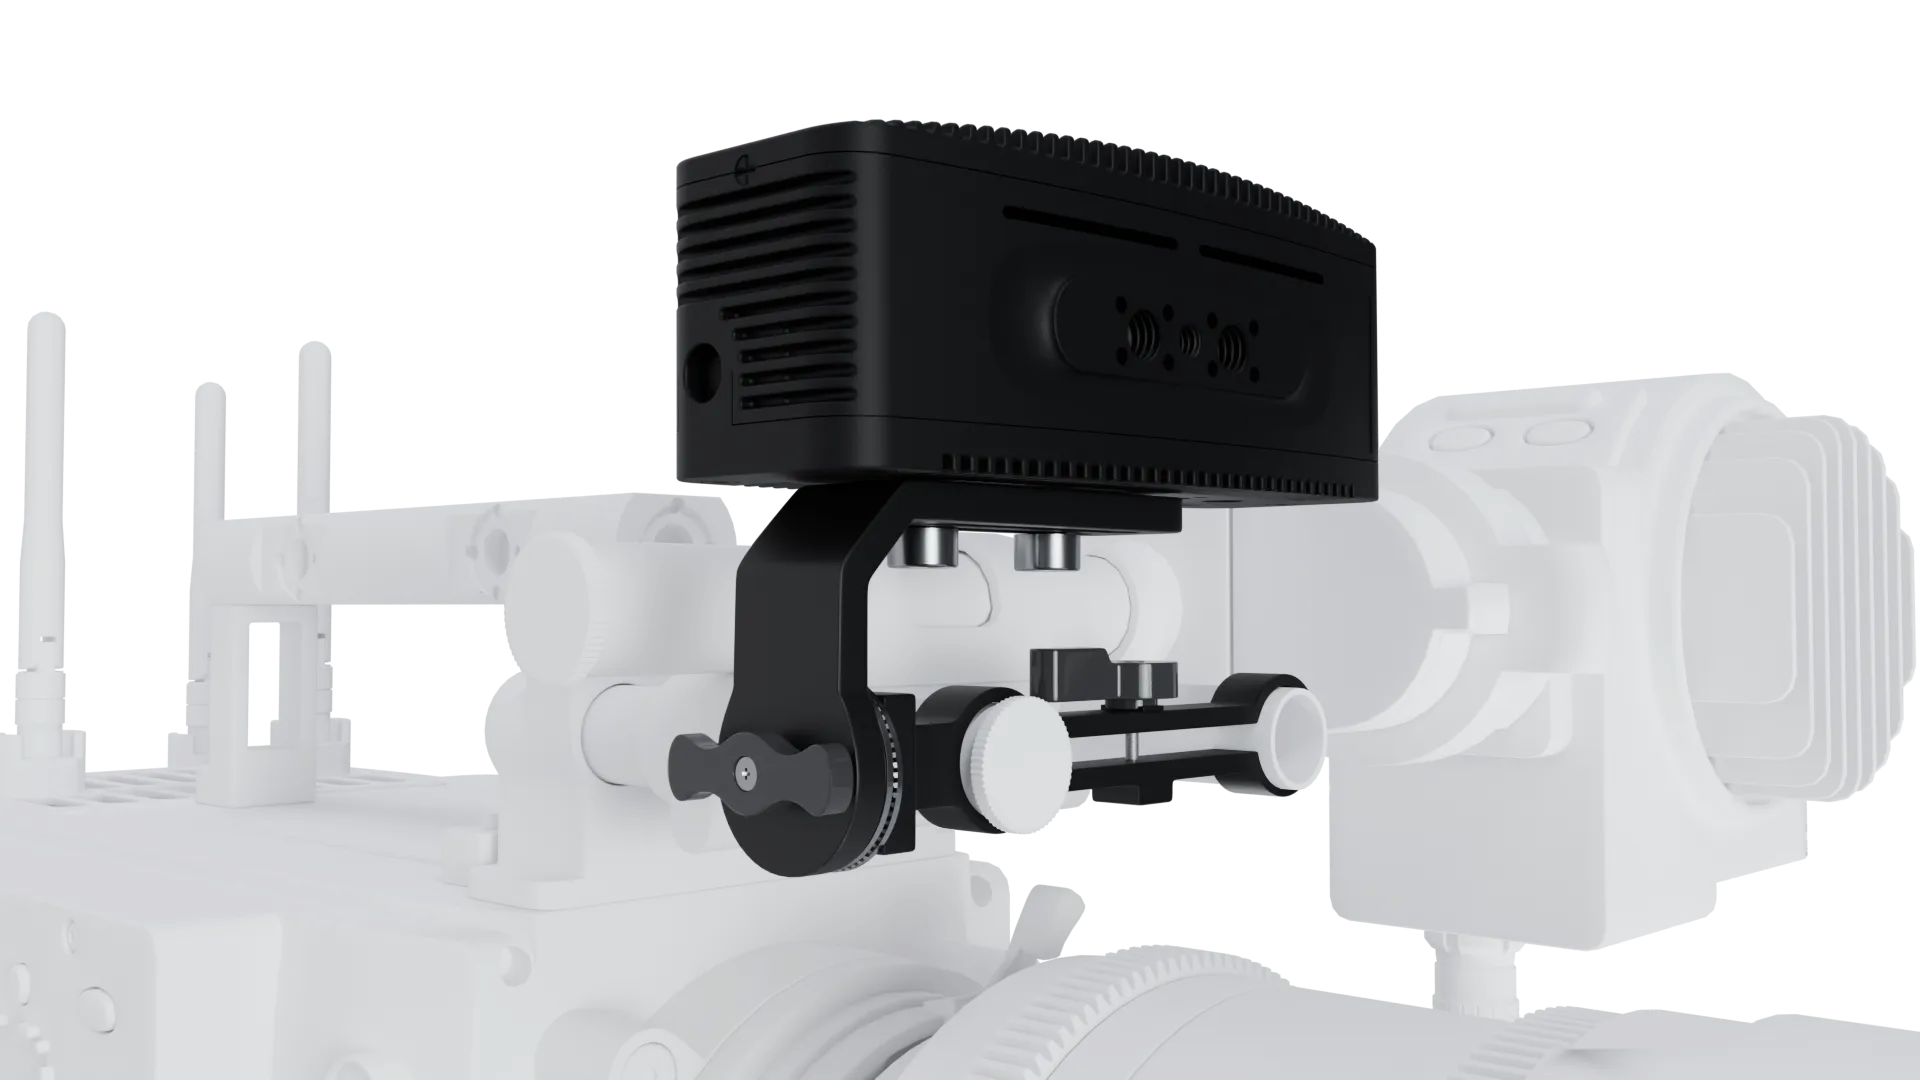
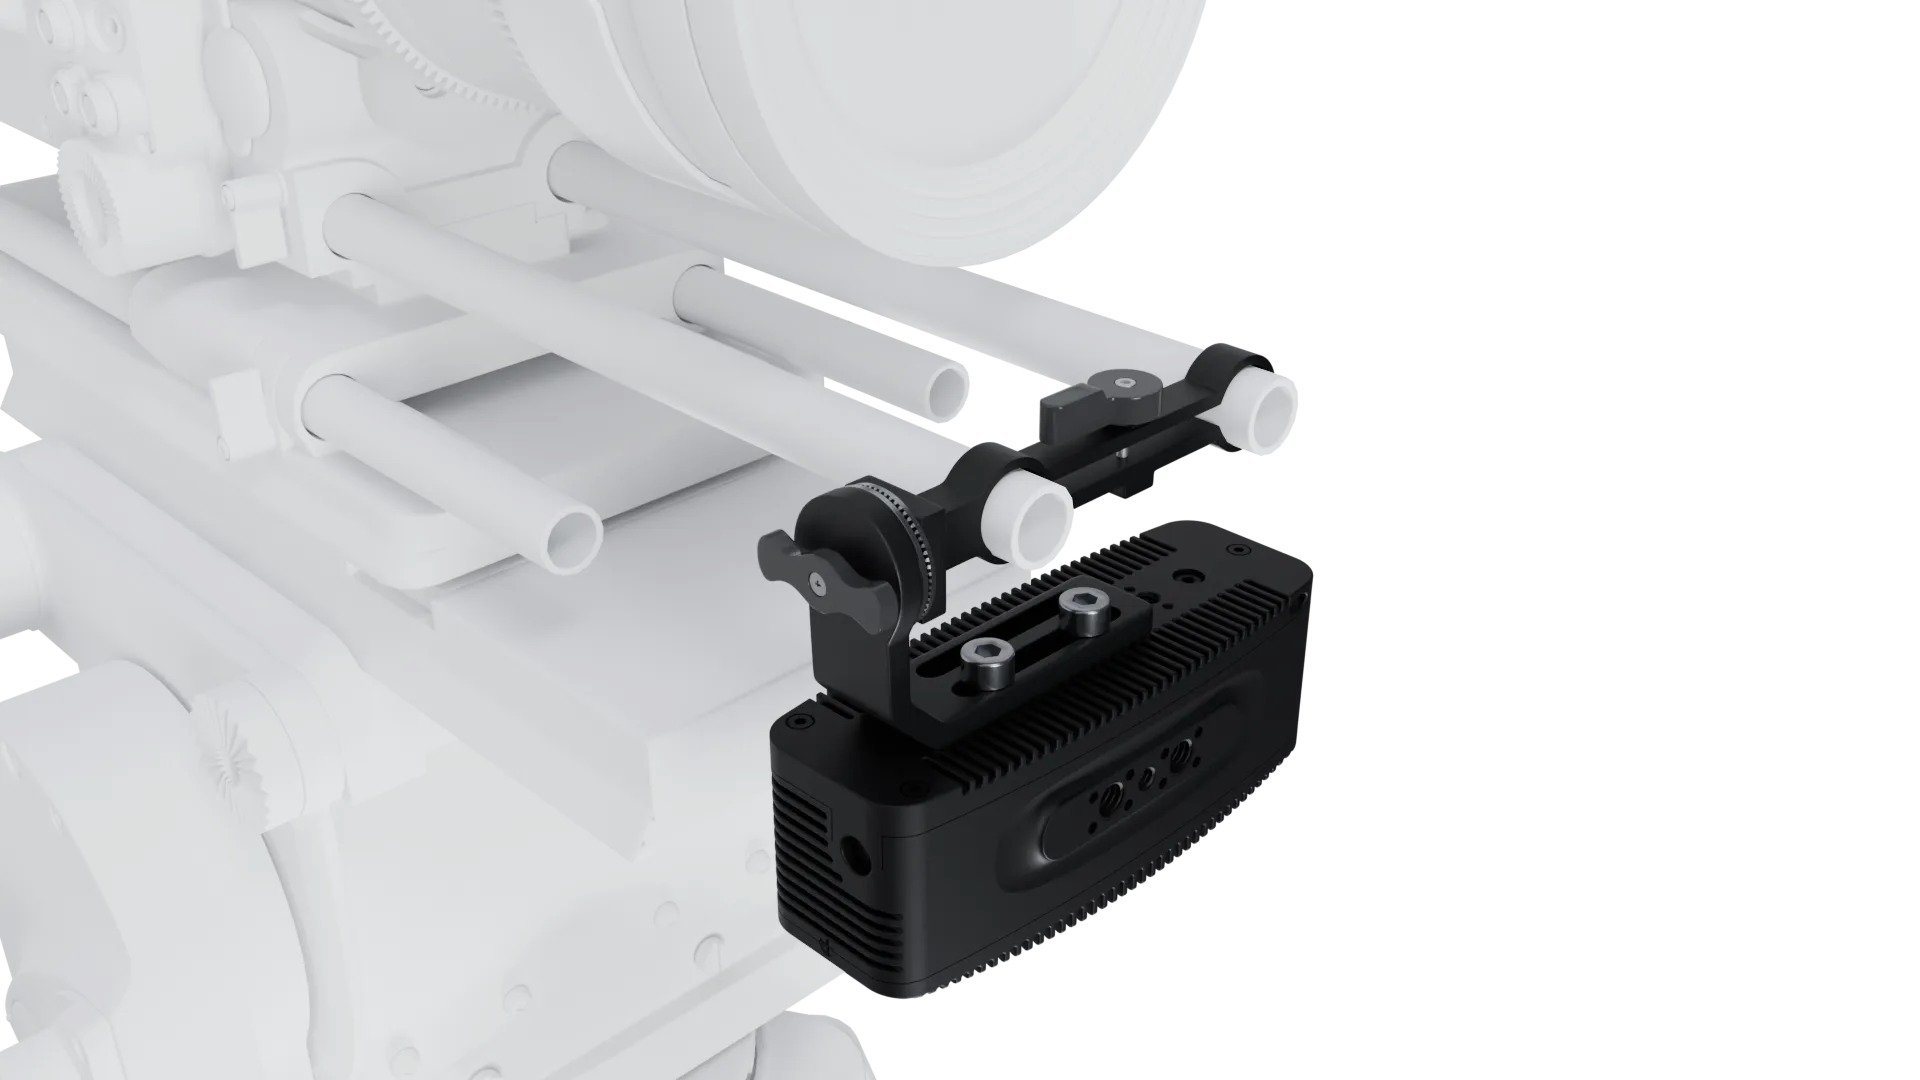
Place part A onto the camera rods and tighten
For ceiling tracking use the upper rods
For floor tracking use the lower rods
Attach the CamBar to the rods using the rossette.
Align the CamBar either vertically up or down depending on whether ceiling or floor tracking
Ceiling
Floor
Marker Mode - Broadcast Style
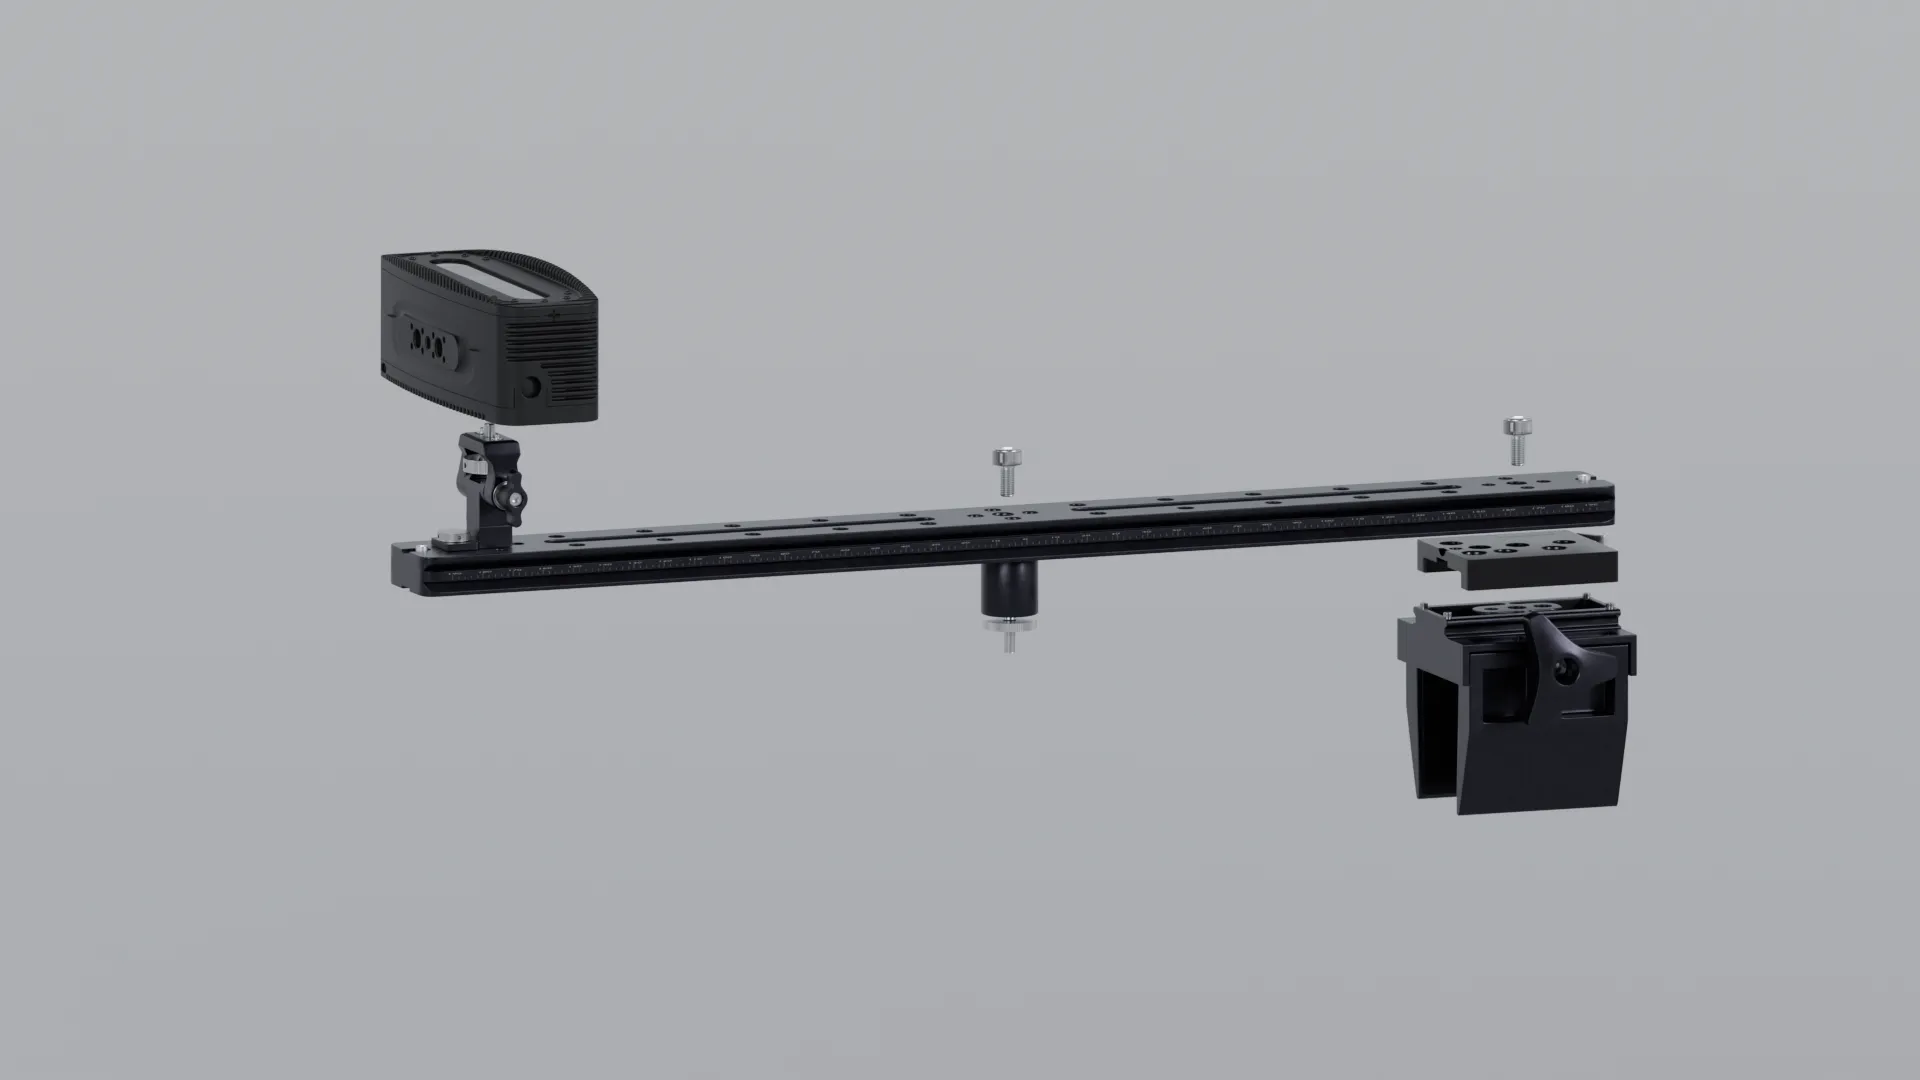
This configuation is designed for ceiling marker tracking when using broadcast style cameras. It uses a clamp and long extension plate to affix to the camera grip and project the CamBar out atop the lens.
This configuration is ideal when working with jibs/cranes as it prevents the head of the crane obstructing the CamBar's view of the markers
Pre-Requisites
Camera requires a top handle with at least 1 x 1/4" mounting hole on it
Recommended Components
- A - Haoge HQR-400 400mm Multi-purpose Long Quick Release Plate Extender Sliding Rail for Camera Tripod Ballhead Ball Head Clamp fit Arca Swiss - Retailer Link
- B - SUNWAYFOTO SM-76 Saddle Mount Rifle Gun Adapter for Tripod Arca Swiss QR Plate - Retailer Link
- C - 1/4" UNC Through Hole 20mm Camera Switch Adapter 1/4 Female To 1/4 Female Screw - Retailer Link
- D - Andoer Quick Release Clamp and Quick Release Plate for Arca Swiss Standard Tripod Ball Head - Retailer Link
- F - CAMVATE Swivel and Tilt Adjustable Monitor Mount with 1/4"-20 Anti-Twist Mount - Retailer Link
Mounting Guidelines
Connect the Arca quick release base (D) towards the rear of the extender plate (A) using a 1/4" camera screw
Connect the saddle clamp (B) to the Arca base using the Arca base integrated in the clamp
Connect the Monitor Mount (F) to the opposite side and end of the extender plate (A)
Position the extender plate (A) over the camera grip and fix in place using the saddle clamp
Use a 1/4" camera screw to connect the extender plate (A) to the rigging point at the front of the camera grip. The riser part (C) can be added to the rigging point if required using the 1/4" Male to 1/4" Male Adapter (E)
Connect the CamBar to the monitor mount (F) using the integrated screw
Natural Mode - Cine Style
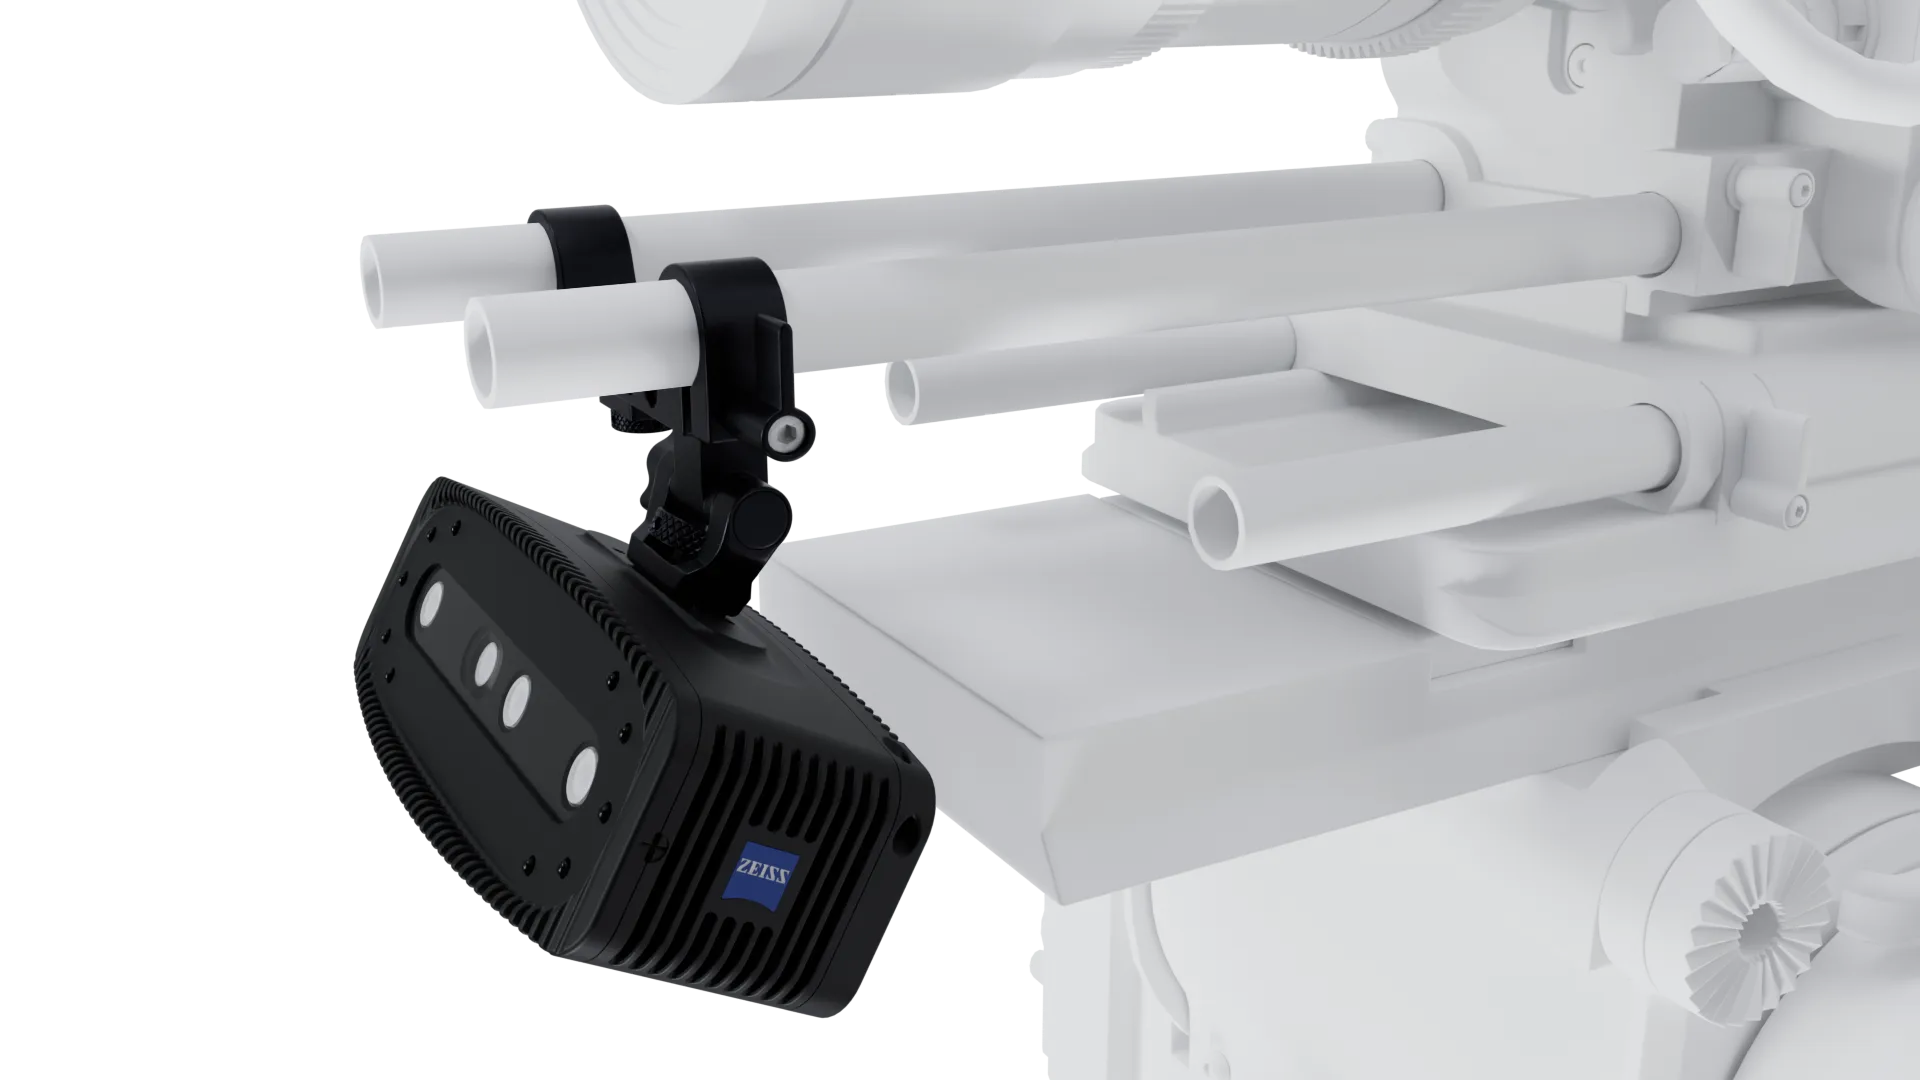
Natural tracking mode typically requires more flexibility in the orientation of the CamBar to ensure good tracking quality. This configuartion uses either a 15mm or 19mm rod clamp and monitor mount to allow significant flexibility in orientation
Pre-requisites
Production Camera must feature 15mm or 19mm rods
Recommended Components
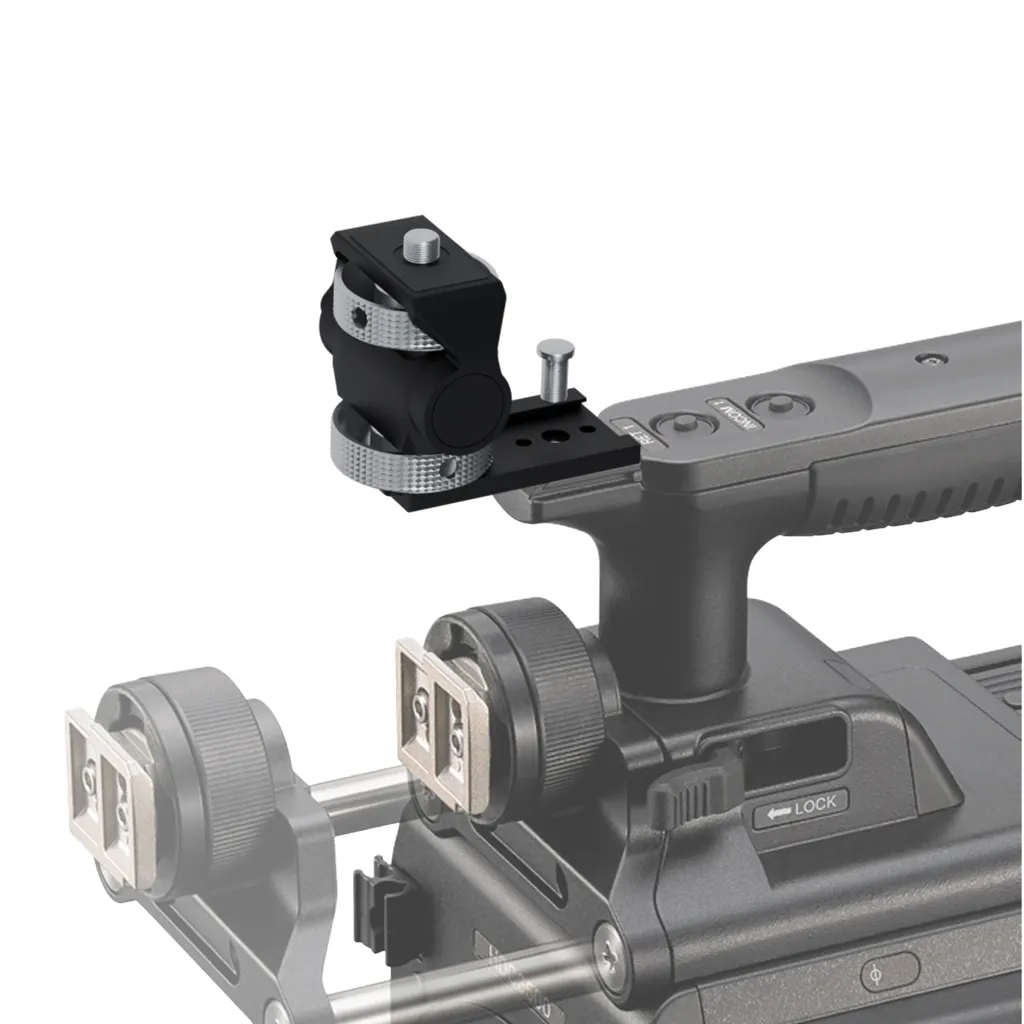
- A - CAMVATE Swivel and Tilt Adjustable Monitor Mount with 1/4"-20 Anti-Twist Mount - Retailer Link
- B - CAMVATE Standard 15mm Dual-port Rod Clamp Railblock With One-sided ARRI Rosette Connecting M6 Mount For Shoulder Mount Rig - Retailer Link
Or for 19mm rods
- C - CAMVATE 15mm & 19mm Dual-port Rod Clamp With Double Ended M6 ARRI Style Rosette Mount - Retailer Link
Mounting Guidelines
Attach the adjustable monitor mount (A) to the rod clamp (B or C) using the integrated 1/4" camera screw
Mount the rod clamp (B or C depending on rod type) to the camera rods. Either the upper or lower rods can be used depending on the tracking requirements
Fix the CamBar to the monitor mount (A) using the integrated 1/4" camera screw
Orientate the monitor mount in the preferred tracking direction and ensure that the mount is securely locked to prevent pan or tilt movement of the mount
Natural Mode - Broadcast Style
With 15/19mm rods likely to be unavailable the accessory mount on the camera grip can be used in conjunction with an adjustible monitor mount to provide a flexible mounting configuration
Pre-requisites
Camera requires at least 1 x 1/4" mounting hole
Recommended Components
- A - CAMVATE Swivel and Tilt Adjustable Monitor Mount with 1/4"-20 Anti-Twist Mount - Retailer Link
Mounting Guidelines
Connect the Monitor mount (A) to the accessory mount at the front of the camera grip
Connect the CamBar to the monitor mount (A)
Orientate the CamBar in the preferred direction for tracking quality and ensure that the monitor mount is securely fastened to prevent unnecessary pan or tilt movement